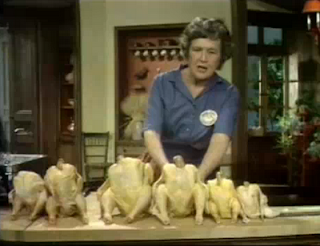
Who can argue with Julia? I certainly can’t, given my limited cooking skills. So, I figured that the roast chicken, or poulet rôti, is the best place to begin my adventures in the kitchen here in Napa. It will be my baseline.

Luckily, I happen to love roast chicken. I order it whenever I go to two of my favorite restaurants in the Valley: Angele and Bouchon. Also, during my lazy culinary days in grad school and law school I consumed many a pre-cooked rotisserie chicken from grocery stores like Harris Teeter, Whole Foods, and Acme. On a budget, it was a good way to get two meals out of about six dollars.
Chicken is the vanilla ice cream of meat. On its own, chicken is often prepared in boring or uninteresting ways. But, even when paired with other flavors, any chicken-ness is either completely masked or, in the case of those inflated skinless chicken breasts, never existed in the first place.
Since I actually wanted to taste the chicken, I decided that the place to start was at the poultry counter at a good, local grocery store: Sunshine Foods. Located in St. Helena, Sunshine has a great selection of high-quality local ingredients. You’ll be hearing a lot about Sunshine in the weeks to come.
My little chicken came from Petaluma Poultry in neighboring Sonoma County and was called a “Rocky Jr.” Petaluma’s Rocky Jr. chickens are the farm’s line of 3 to 3.5 pound free-range chickens. This is a perfect size for two dinners worth of chicken for me. Although the recipe I used (Bouchon Cookbook by Thomas Keller, pp. xii, 192) called for a 2 to 2.5 pound chicken, I think that this slightly larger bird worked perfectly. And, at less than $10, it wasn’t too expensive.
The first step: brining. (Recipe techniques and components will be a highlighted in bold.) The key flavor components of this brine included a lot of salt, honey, lemon juice, thyme, and rosemary (see picture at right), all of which had to be brought to a boil together in water and then cooled before it could be used.

After letting it swim in the aromatic brine for about four hours (the recipe called for six, but I think four was sufficient), I took the chicken out to dry and warm to room temperature. It was now time for me versus Rocky in Battle Truss. I had never trussed a chicken or tied up any meat for that matter. The purpose of trussing is to keep the meet compact for even cooking. I did my best to follow the cookbook instructions and even checked out a few instructional videos on YouTube.
I’m sure it could have been tighter and that mistakes were made, but I don’t think it was too bad for a first attempt. From what I saw on-line, there are two schools of trussing -- the Neck School and the Leg School – depending on where you start the process. Keller (and the YouTube link above) belong to the Neck School, starting there and keeping the twine tight around the wings. Then, to plump the breast meat, you tie a not under the breast before pulling each end of twine under the legs and then up. This brings the legs close together. Then, simply tie a knot to hold the legs and cut off the excess. And, you have a trussed chicken!

That was pretty much the end of my work. The chicken went in a 450 degree oven. I rotated the chicken a couple of times to ensure even cooking, and after 50 minutes out it came. Once the chicken skin was a golden brown, I added some chopped thyme to the juices in the bottom of the pan and basted the skin with this mixture a couple of times.
Then, the toughest part: waiting. I let the chicken rest for about 5 minutes while I opened a bottle of Madrigal Vineyards 2006 Merlot. A new release from one of my favorite wineries in the Valley, it was BIG and I probably should have opened it when I started brining the chicken. It tasted much better a couple hours later.
After my first bite, I vowed (to myself and my housemate’s dachshund Romeo) never to make poultry without brining ever again. The meat, even the breast meat, was tender and tasty and didn’t require any additional salt or seasoning once it was on the plate. Although I don’t think that I got the rosemary, thyme, and lemon in balance, they were not so overwhelming as to mask the natural flavors of the bird.
After finishing half of the chicken,** I began to think about Julia’s suggestion again and what she really meant. Roasting a chicken really only requires two very basic skills: boiling water for the brine, and knowing when to take the chicken out of the oven (a meat thermometer makes this latter skill quite easy). So, I don’t think she meant that a roast chicken should be used to evaluate a cook’s skills. Rather, I think it is a way of evaluating a cook’s attitude or approach. If you take the time to elevate something so humble and common as a roast chicken by investing in good ingredients and a little extra time, then maybe you belong in the kitchen after all.

**What happened to Rocky Jr.’s second half? That’s coming soon, but I’ll give you one hint: crepes!


No comments:
Post a Comment